With Ubuntu 18.04 LTS (BionicBeaver) having been released on the 8th of August 2019, everyone using its predecessor Ubuntu 16.04 LTS (XenialXerus) stands before the annoying decision of when to upgrade. With a proven track record of upgrading screw ups (allegedly ?), this is not a decision made lightly – especially, when End of Support (April 2021) as well as End of Life (April 2024) seem to be still quite far off.
However, as peace of mind prevails, I tend to upgrade once the main upgrading related issues have been sorted out – or at least have been discussed in the community forums. For me the sweet spot to jump on a new release is around 2-3 months after its roll out. If you have to support something mission critical, this might take a bit longer.
Be that as it may, let’s get Ubuntu 16.04 upgraded to Ubuntu 18.04 on DigitalOcean ?.

Step 1: Snapshots, Snapshots, Snapshots
It seems redundant to write this – but it’s unfortunately still common practice to just wing it when upgrading a system. But it should go without saying that losing all of your data is a bit more than potentially problematic. As I run all of my infrastructure on virtual servers (Droplets) provided by DigitalOcean, it’s very easy to not only back-up all of my data, but to make a functional snapshot of the full machine.
If you want to take a snapshot of your droplet, you simply go to the droplet in question, select „Snapshots“ in the sidebar menu and click the „Take live snapshot“ button – and wait for it to finish.

It’s good practice to shutdown the droplet before doing so as well as ensuring that the snapshot actually works, so you don’t have any surprises if something does go wrong…
Step 2: Installing updates
Let’s start with the fun part: installing stuff. Hop onto your machine with the nice SSH access of yours.
$ ssh user@1.2.3.4I hope for you, that you have a nice SSH key already installed so you don’t waste precious time thinking about your password.
Update already:
$ sudo apt update
$ sudo apt upgrade
$ sudo apt full-upgrade
I know, I know – the last one might be redundant. Sue me ?
Step 3: Upgrading to that hot new version
And here we are, finally ready to upgrade to Ubuntu 18.04.
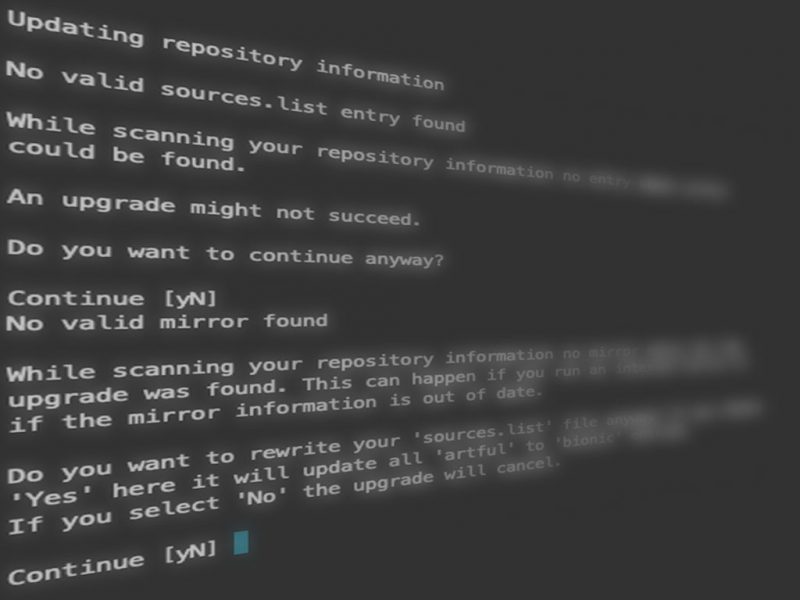
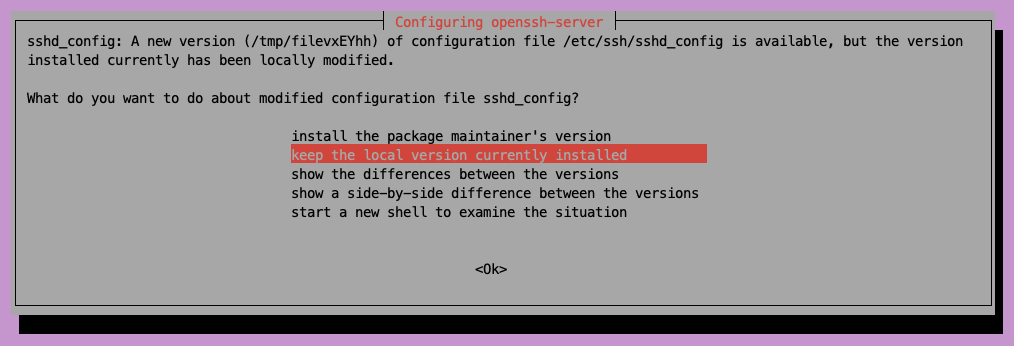
$ sudo do-release-upgradeYou will be asked some questions before the upgrading process starts. Just hop along with ‚y‘ and everything will be fine (hopefully^^). A healthy dose of reading the output and thinking about what it means will do the trick. Just be aware that this might take a while. You’ll also be prompted with a SSH config step – as I have modified my sshd_config I will stick to my current one.
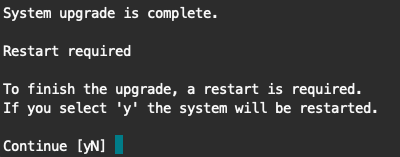
After some time your happy little machine should be telling you that the upgrade is complete – otherwise you will have encountered some error. As this requires a restart, continue with ‚y‘.
After accepting this, you will be disconnected. Give your machine a couple of seconds to reboot and reconnect.
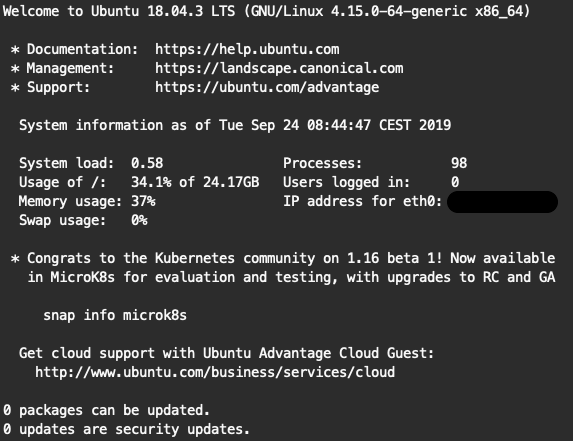
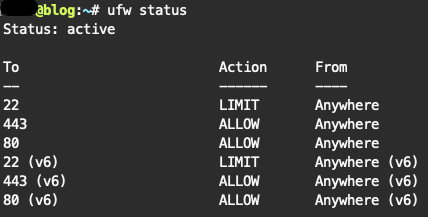
And there we go – 18.04 LTS (XenialXerus) runs smoothly, including all services that were hosted on the machine before upgrading. For peace of heart, it’s not unreasonable to check ones firewall, so that just the needed ports are open to the public.
And that’s that ????